Turn your selfies into dating profile gold
Our AI photographer transforms your everyday photos into polished, scroll-stopping dating profile shots — in minutes, not days.
How to Take Good Dating Photos: A Step-by-Step Guide
 Ryan ColeApril 23, 2026
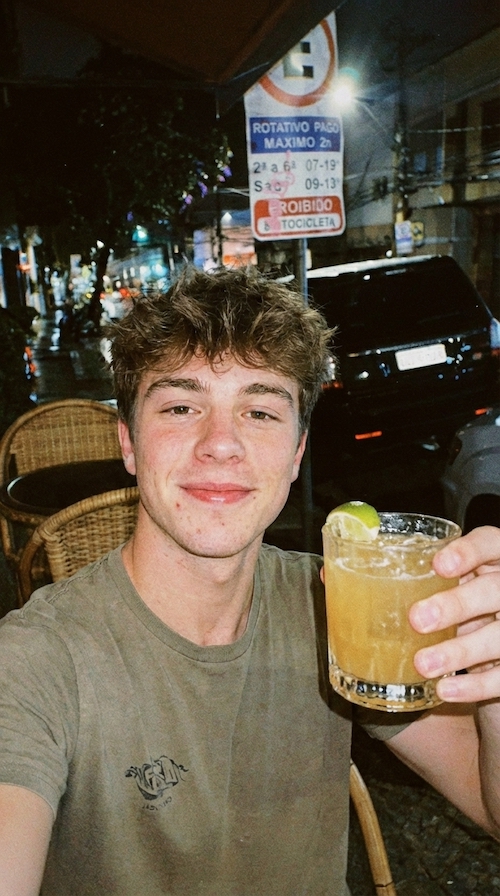
Your dating photos don't need to be "professional." They just need to work. The problem is that most of us are uploading whatever happens to be in our camera roll: a cropped group shot from someone's wedding, a slightly blurry beach pic from two summers ago, a bathroom mirror selfie taken at 11pm. The result is a profile that looks accidental, not intentional, and dating apps reward intention.
This is a full, step-by-step guide to shooting your own dating photos with nothing more than a phone, natural light, and a bit of planning. No studio, no photographer, no $400 dating portrait package. Follow the steps below and you'll walk away with a lineup that looks like a genuinely good version of you on a genuinely good day.
Why this matters
Photos drive the vast majority of swipe decisions
Before anyone reads your bio, they've already made a judgement from the images. Photofeeler's rating data consistently shows that small, fixable details (lighting, angle, expression) swing attractiveness scores more than people expect.
Step 1 — Plan the Shoot Before You Pick Up the Phone
The fastest way to end up with mediocre photos is to wing it. Spend ten minutes before you start thinking about what you're actually trying to show. A strong dating lineup usually tells a three-part story: a clear face, a body in context, and a life worth being curious about. Plan one or two shots for each bucket before you go out, and if you're short on concepts, these dating profile picture ideas are a good place to start.
Pick 2–3 locations
A park, a cafe, your street, a rooftop. Variety shows up as a better profile without extra effort.
Choose 2 outfits you actually wear
Solid colors that fit well, no branded graphics competing for attention. You want to look like your best real self, not a costume.
Book the light, not the time
Aim for the hour after sunrise or before sunset, when the golden hour flatters almost every face shape and skin tone.
Bring a friend if you can
A second person gets better angles than a tripod and makes you laugh, both of which show in the final shot.
Step 2 — Get the Lighting Right
Lighting is the single biggest free upgrade to your photos. Good light hides imperfections; bad light invents them. The rule of thumb is simple: face the light, don't stand with your back to it. Avoid overhead midday sun (harsh shadows under the eyes and nose) and avoid indoor ceiling lights at night (flat, yellow, unflattering).
Best light for dating photos, in order
1) Golden hour outdoors → 2) Open shade on a sunny day → 3) Soft, overcast daylight → 4) A big window, indoors, facing you. Everything else is a compromise.
Step 3 — Set Up Your Phone Like a Real Camera
Most phone cameras are better than the photographer using them. A few setup changes turn a phone into a surprisingly capable portrait rig.
- Use the 2x or 3x lens for headshots. The main (1x) wide lens distorts faces at close range, making noses look bigger and ears smaller. Stepping back and zooming in optically (not digitally) gives a flattering compressed look.
- Shoot at eye level, not from above or below. Phone above face = you look smaller and apologetic. Phone below face = unflattering angle. Keep the lens level with your eyes.
- Turn on gridlines and use the rule of thirds: put your eyes on the top third line. Photos composed this way look professional without any editing.
- Tap to focus on the face, then lock exposure. On iPhone, tap and hold until you see "AE/AF LOCK." Now the camera won't re-expose every time a cloud moves.
- Use burst mode or Live Photos. One frozen frame rarely captures a natural expression. Shoot 10, keep 1.
Step 4 — Pose Without Looking Like You're Posing
Nobody looks natural the first time a camera points at them. The trick is to give your body something to do so you're not just standing there. Micro-movements (a slow step forward, a hand running through hair, looking just past the camera) read as candid even when they're not.
🚶
Walk toward the camera
☕
Hold something (coffee, a book)
👀
Look away, then back
🤝
Talk to your friend, mid-sentence
😂
Laugh at something real
🧥
Adjust a jacket or sleeve
Body-wise: turn your torso slightly off-axis from the camera (3/4 angle) and put weight on your back foot. This instantly looks more relaxed than squaring up to the lens like a driver's license photo.
Step 5 — Smile Like You Mean It
A warm, genuine smile, one that reaches your eyes, is the highest-performing expression on dating apps, almost without exception. It's not even close. Photofeeler's trustworthiness research shows that smiles raise trust scores, and trust drives matches and replies far more than "attractiveness" alone. The broody, staring-into-the-distance shot you think makes you look deep almost always reads as cold.
"A real smile, a Duchenne smile that crinkles the eyes, is almost impossible to fake. The trick is to actually think of something funny right before the shutter fires."
Two quick ways to get a real smile on camera: have your friend make you laugh mid-shot, or practice a "soft smile" in the mirror a few times first (lips slightly parted, eyes engaged, not a full grin). Even for a full-body shot, your face is still doing most of the work.
Step 6 — Shoot the Six Photos You Actually Need
You don't need 30 photos. You need six good ones, each doing a specific job. Work through this list during the shoot and tick each one off.
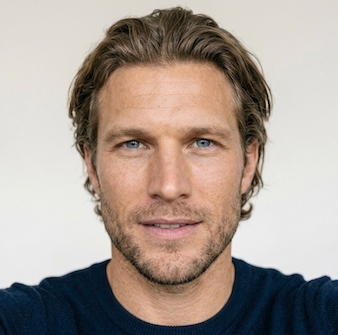
1. Clean headshot
Face clearly visible, natural light, warm smile, eyes to camera.
2. Full-body shot
Outdoors, relaxed stance, so people can see what you actually look like.
3. Doing something
A hobby, sport, or activity you genuinely do. Action beats posing.
4. Social proof shot
One photo with friends, clearly showing which one is you.
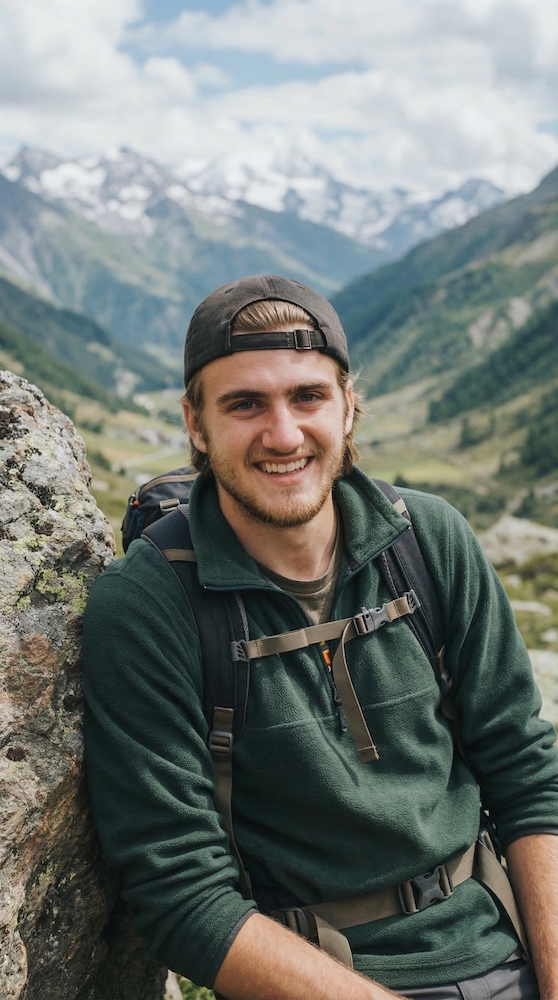
5. Environment / travel
Somewhere that gives a sense of what your life looks like.
6. Candid / laughing
One off-guard, unposed moment that shows personality.
Tick all six off and you've done more than 90% of profiles out there. Apps like Hinge's own research blog consistently point to variety and action shots as the highest-performing photo categories, not identical-angle selfies, and the same patterns turn up in the best dating profile photos for men.
Step 7 — Edit Lightly, Then Stop
Good editing is invisible. Your photos should look a little better, not obviously "edited." Open each keeper in your phone's default editor and make tiny adjustments, nothing more dramatic than these:
- Exposure +5 to +10 if the shot is slightly dark
- Contrast +5 to make the image pop without looking HDR
- Crop tighter. Tight crops usually outperform wide ones on mobile feeds
- Straighten the horizon if it's even slightly off
- Skip filters entirely. Heavy filters signal "hiding something" and tank trust scores, which, as body-language research keeps confirming, is the real currency of first impressions.
Step 8 — Pick the Final Lineup (The Part Most People Get Wrong)
You'll probably end up with 40–60 shots. The hardest step is cutting ruthlessly, and it helps to know what a strong final set looks like, so skim these dating app photo examples first. A rough rule: if a photo is only "pretty good," delete it, because it's dragging down the average. A profile with 4 great photos beats a profile with 4 great photos + 3 mediocre ones every time.
Order matters too. Your first photo is the one that stops the scroll and does the most work on your online dating first impression, so use the cleanest headshot there. The rest should vary: alternate close-up and wide, indoor and outdoor, posed and candid. Don't put two similar photos back-to-back or you'll look like you only have one good angle.
Cut these immediately
Bathroom selfies, gym mirror shots, sunglasses in every pic, photos older than 2 years, heavily filtered shots, group photos where you're hard to spot, and anything with a bad ex cropped out. None of these help, and all of them lower your overall average.
What If You Don't Have Anyone to Shoot You?
Plenty of people reading this don't have a photographer friend on call, don't feel comfortable asking, or just hate being on camera. That's fair. If the "go outside and shoot with a friend" step is a non-starter, AI can fill the gap, with one caveat.
Tools like Fotto.ai let you upload a handful of casual selfies and generate a lineup of realistic photos in different settings (headshots, full-body, outdoor, lifestyle) that actually look like you, not an idealised digital version. The point isn't to replace real photos when you can take them; it's to give you a decent profile today so you're not sitting on the sidelines while you wait for the perfect weekend to shoot.
Two rules if you go this route: keep the results honest (no obviously invented locations or facial structure), and mix one or two real casual phone shots in alongside the generated ones. A fully AI profile reads as suspicious; a mixed profile reads as a regular person with good photos.
The Short Version
Good dating photos aren't about luck, genetics, or expensive gear. They're about a clear process: plan the shoot, chase good light, set the phone up right, move while you're being shot, smile for real, capture the six types of photos you actually need, edit lightly, and cut ruthlessly.
Do that once, even spending a single Saturday afternoon on it, and you'll have a profile that genuinely represents you. And if you ever need a shortcut or a boost between real shoots, Fotto.ai can help you fill the gaps without faking anything.
Keep Reading
Easily remove unwanted photo backgrounds with Fotto.ai. Enhance product shots, create stunning edits fast, no Photoshop needed.
Discover the top 6 AI-powered tools to blur photo backgrounds in seconds. From quick mobile editors to advanced professional software, this list includes beginner-friendly and expert-level options — including fotto.ai.
Four dating app photo examples that consistently outperform, the patterns behind them, and the habits that quietly tank an otherwise good profile.
Why casual lifestyle photos beat posed studio shots on dating apps, the four scenes that signal approachability, how to capture candids that don't feel forced, the pitfalls to avoid, and the photo-mix ratio that actually performs.
Quality on Hinge is profile depth, not a swipe trick. How intent fields, lifestyle photo cues and quietly shown values screen for compatibility.
Bumble's 24-hour timer eats men alive. Why your matches never open, the photo and bio fixes that give her something to send, and what to do next.
We compared 10 AI dating photo generators on price, photos, speed and subscriptions. Real prices, sources linked, and where each one loses.
Bumble matches gone quiet overnight? The 7 signs of a Bumble shadowban, 4 tests to confirm it, and the reset sequence that gets you shown again.